Lets get started!
1. In SketchUp, save a Scene under View>Animation>Save Scene, that you want to use for the illustration that way you can get back to the same view later if need be.
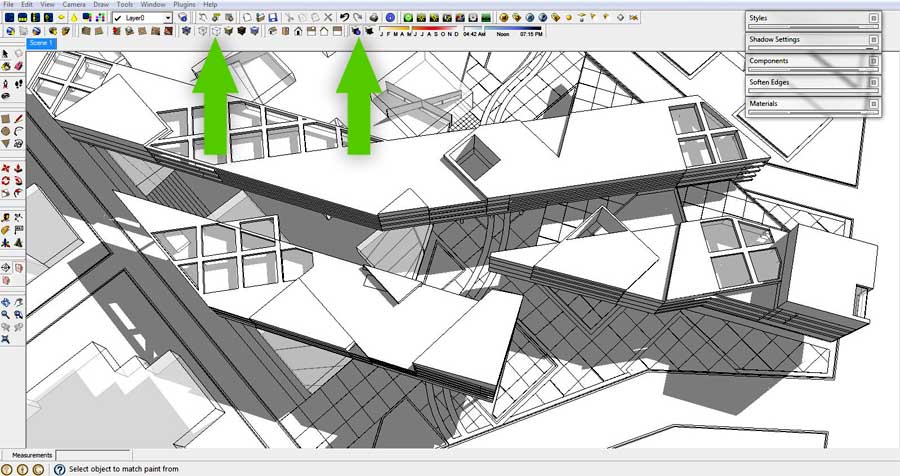
2. Switch the Face Style to “Hidden Line”. Under View>Edge Style, check “Display Edges.” Make sure Shadows are off.
3. Go to File>Export>2D Graphic and save the image as a JPEG.
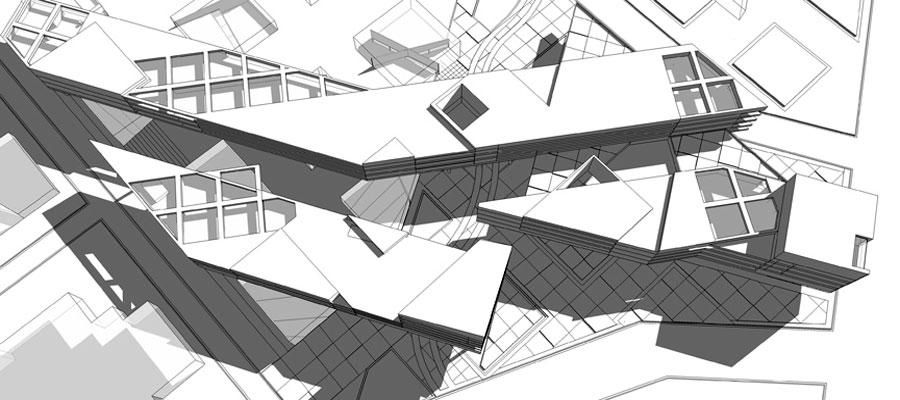
4. With the Face Style still set to “Hidden Line”, turn on Shadows and again export the image as a JPEG.
That’s it! It may seem like a lot of steps, but I think once you go through them a few times, you will realize they are relatively simple and the whole illustration can be created in a matter of minutes. I hope you found this tutorial useful and you can maybe introduce it into your own workflow, especially when you need something really quick and simple!
Thanks for reading..
Alex Hogrefe
1. In SketchUp, save a Scene under View>Animation>Save Scene, that you want to use for the illustration that way you can get back to the same view later if need be.
2. Switch the Face Style to “Hidden Line”. Under View>Edge Style, check “Display Edges.” Make sure Shadows are off.
3. Go to File>Export>2D Graphic and save the image as a JPEG.
4. With the Face Style still set to “Hidden Line”, turn on Shadows and again export the image as a JPEG.
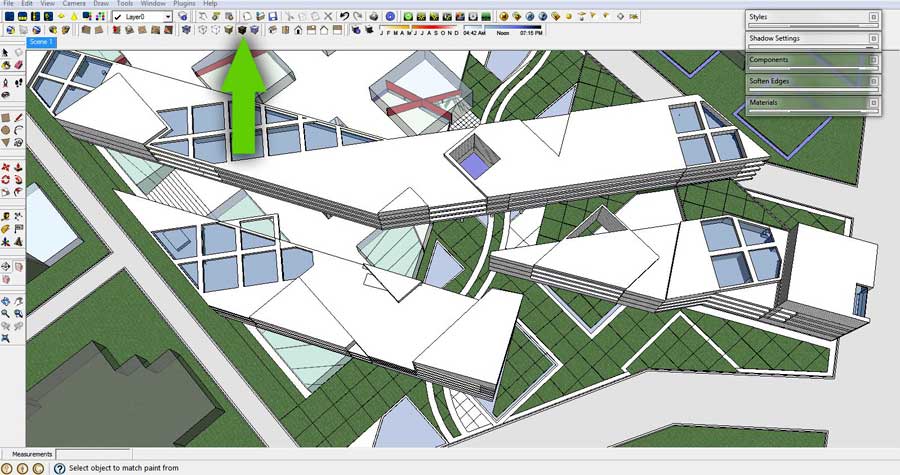
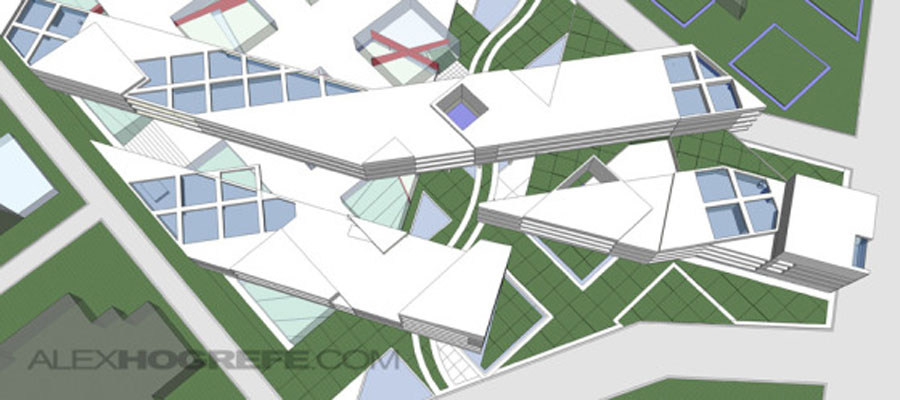
5. Now, switch the Face Style from “Hidden Line” to “Shaded with Texture.” Again, export the image as a JPEG.
6. With the 3 images complete, it’s time to combine them in Photoshop. Begin by opening the first image (SketchUp export with only line work, no shadows) in Photoshop. Right click on the Background layer (Click in the space next to name of the layer) and choose “Duplicate Layer”.
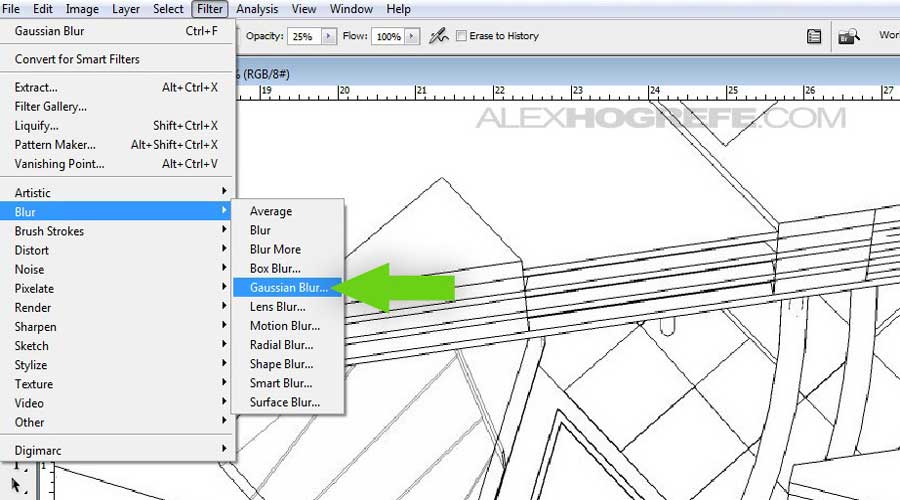
7. At the top, select “Filter>Blur>Gaussian Blur”.
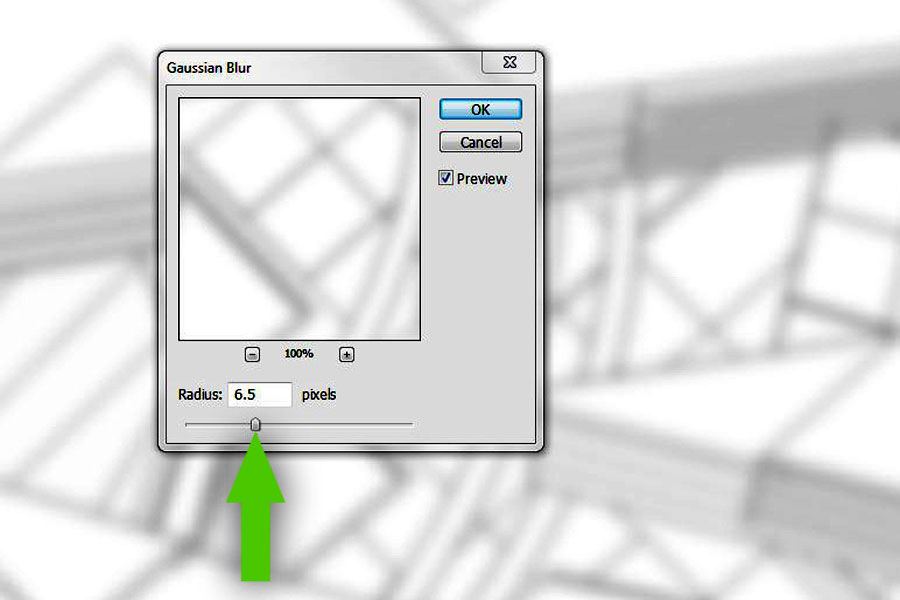
8. When the dialogue box appears, choose a Radius of about 6.5. This number may need to change depending on the resolution of your image.
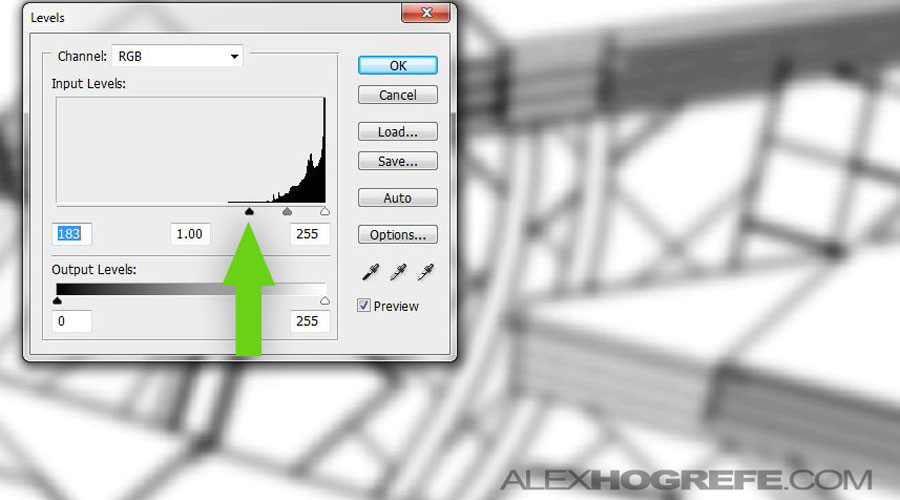
9. With the lines now blurred, we need to darken them. I prefer to use Levels although you can probably get away with adjusting the contrast. For Levels, go to “Image>Adjustments>Levels”. Move the left black triangular slider to the right until the line work darkens to almost black.
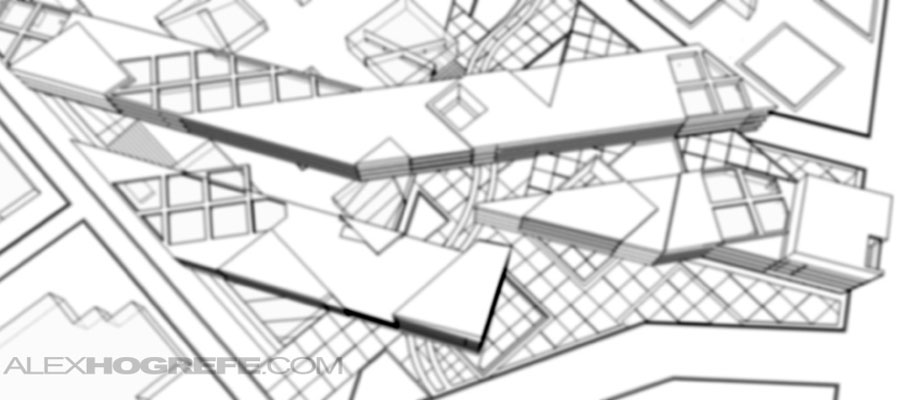
Below, is what the image should look like at this stage.
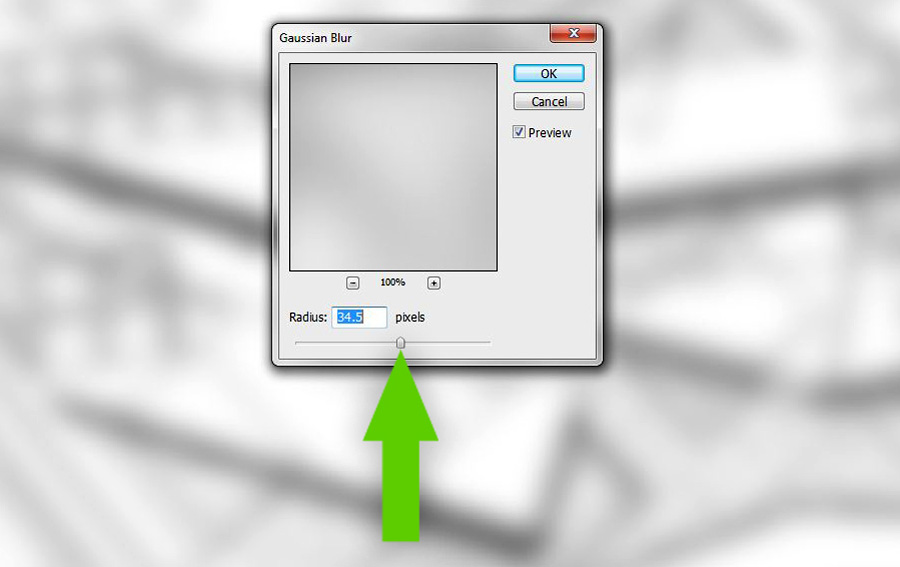
10. Next, duplicate the layer just created and move the new layer to the top. This duplicated layer will be blurred again using the Gaussian Blur filter. However, use a higher Radius such as 35 this time.
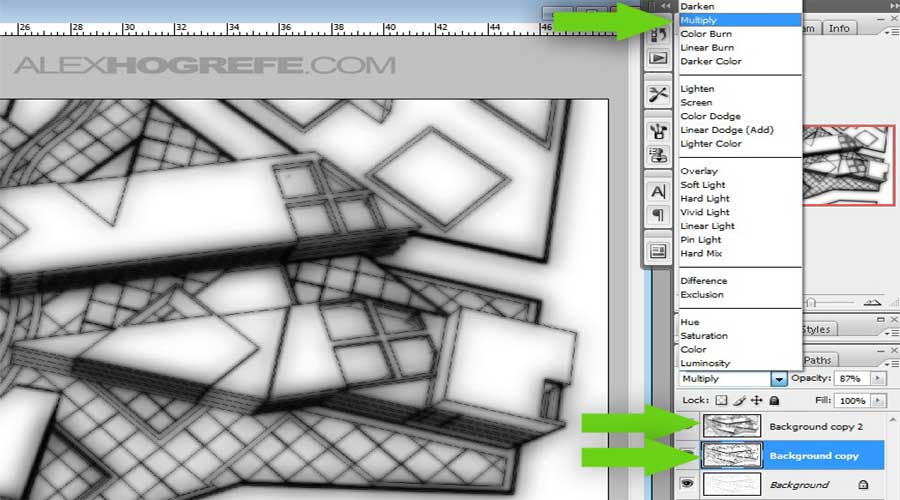
11. I want the original line work Layer to show through the two, now blurred Layers just created. To do this, select the two blurred Layers and set the Layer blending mode to “Multiply”.
12. The next step is sort of the “secret sauce” of the tutorial.
a. Open the SketchUp exported image that showed both the line work and shadows.
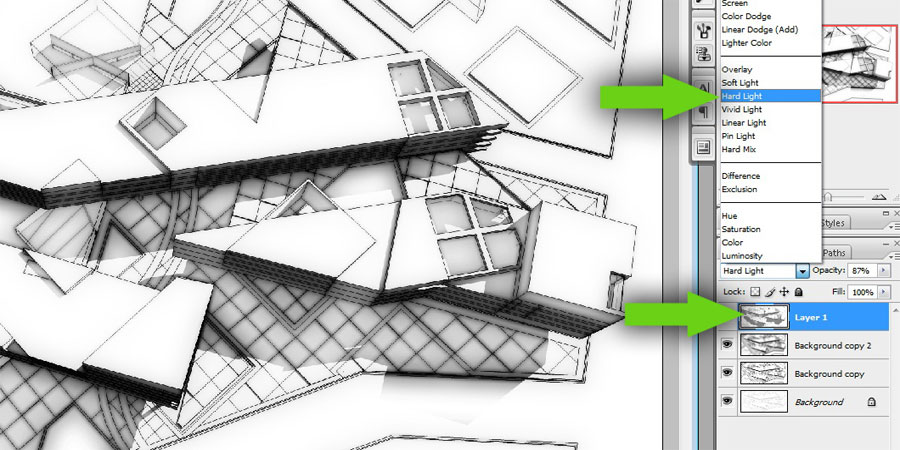
b. Drag the new Layer to the top of the layer stack. Set the Layer blending mode to “Hard Light”.
13. Add some color to the image.
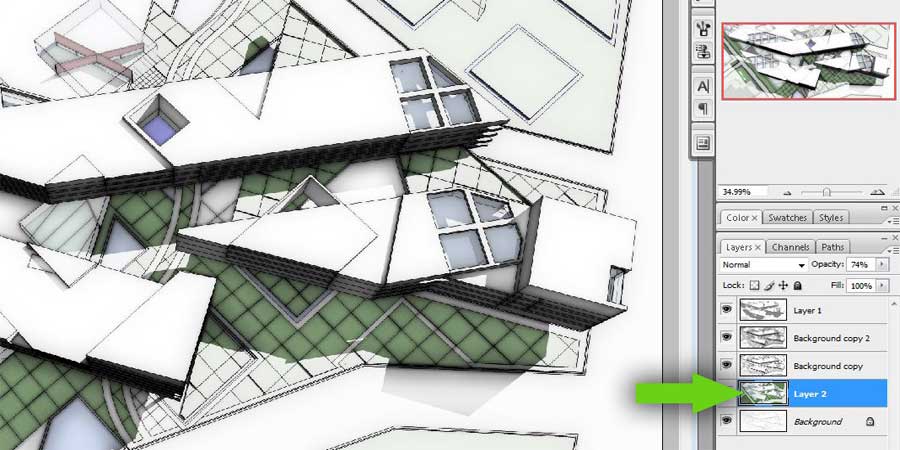
a. Open the SketchUp exported image that had the face style “Shaded with Textures” turned on.
b. Drag the new Layer to the bottom, just above the “Background” Layer.
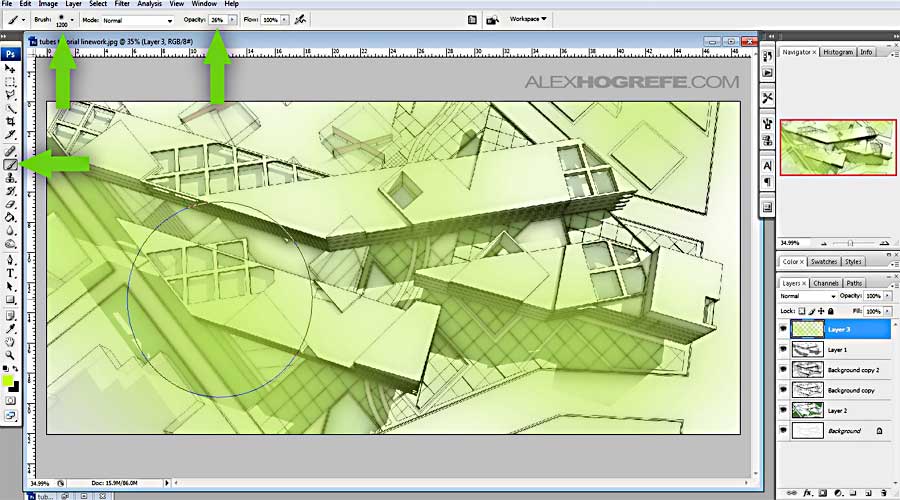
14. I like to add color overlays to my illustrations to give them more of a mood. Create a new Layer and move it to the top Layer. Select the “Brush Tool”, and adjust its settings to have 0 Hardness as well as lower the Opacity down to 25 to 30%. Begin painting in areas where you want more color.
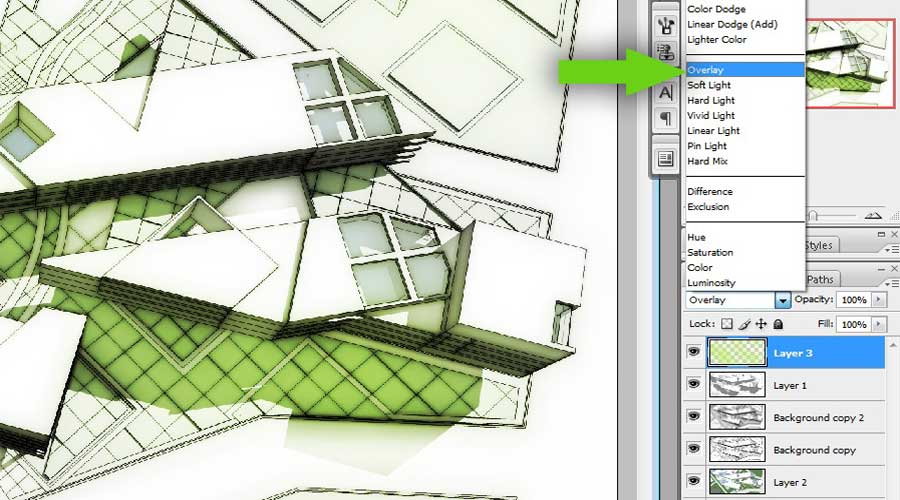
15. Set the Layer blending mode to “Overlay”.
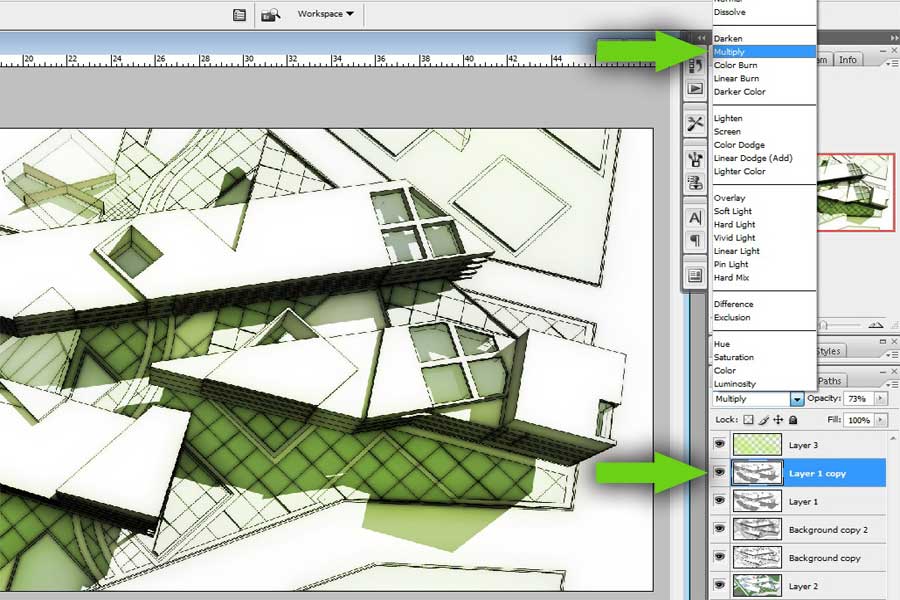
16. One last thing, I want the shadows to be a little more darker. To do this, select the Layer with lines and shadows that was set to “Hard Light” in Step 12 and “Duplicate” it. Now, select the new duplicated Layer and change the Layer blending mode from “Hard Light” to “Multiply”. You can adjust the Layer Opacity if the shadows are too strong.
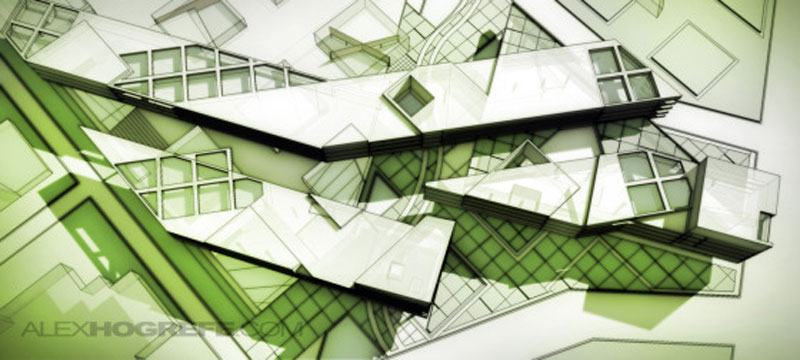
For the final shot below, I added some vignetting (Tutorial Here). I also overlayed another exported SketchUp image with the face style set to “X-Ray” mode for more detail in the light areas of the illustration.That’s it! It may seem like a lot of steps, but I think once you go through them a few times, you will realize they are relatively simple and the whole illustration can be created in a matter of minutes. I hope you found this tutorial useful and you can maybe introduce it into your own workflow, especially when you need something really quick and simple!
Thanks for reading..
Alex Hogrefe




~ 0 comments: ~
Post a Comment