To get started, 3 images will be generated which will be used in Photoshop. Two of them will be exports from SketchUp, and one will be a basic rendering from the free rendering software Kerkythea.
1. First Image – Base Image
a. In SketchUp, save a scene that you want to use for the illustration. That way you can get back to the same view later if need be.
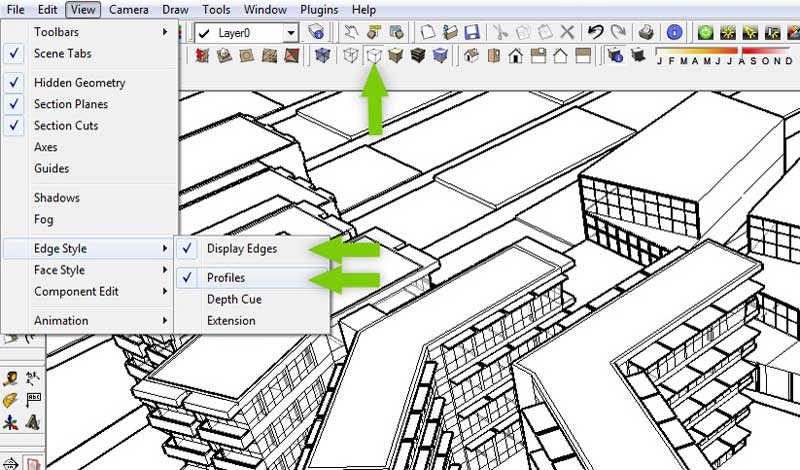
b. Switch the Face Style to “Hidden Line.” Under View>Edge Style, check “Display Edges” and “Profiles.”
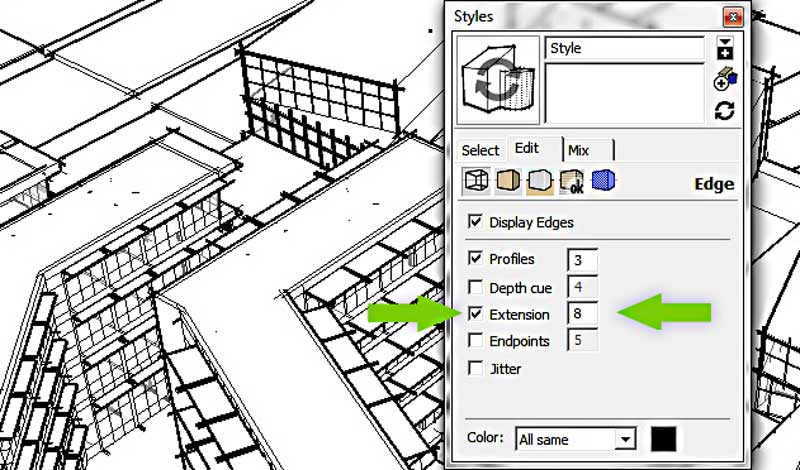
c. In the Styles dialogue box, select the “Edit” tab, choose the “Edge Styles” icon, and check “Extensions.” Set the length to 8 pixels.
d. Export the image as a JPEG by clicking on “File>Export>2D Graphic.”
2. Second Image – Guides
The point of this second export will be to imitate guidelines seen in hand drafted illustrations back in the good old days.
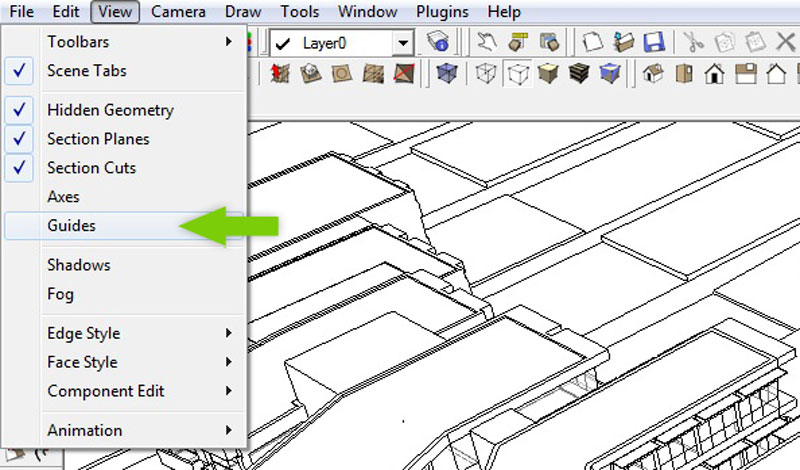
a. Select “View” and check “Guides in SketchUp.”
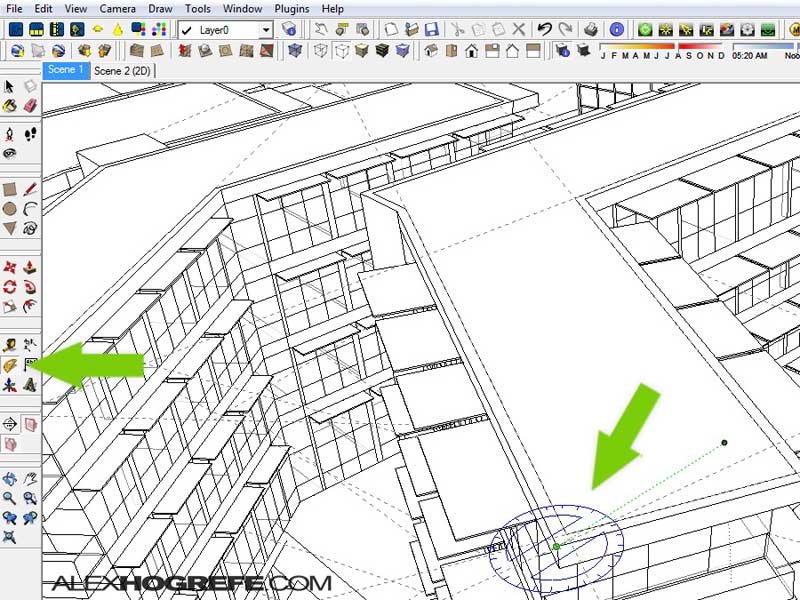
b. With guides turned on, begin creating guides that accentuate important axis or angles in the image. To create guides, measure something with either the ruler or the protractor. Whatever is measured will then turn into a guideline.
c. With the guides in place, go to File>Export>2D Graghic and save the image as a JPEG. Again, use the Face Style “Hidden Line” and leave only “Display Edges” checked for the Edge Style.
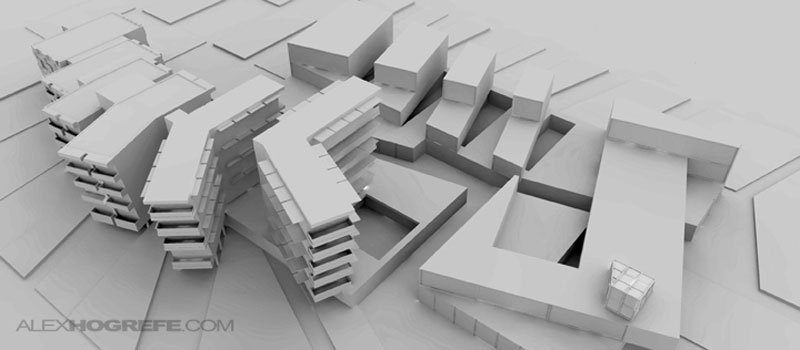
3. Third Image - Basic Kerkythea RenderingThis Kerkythea rendering is very basic with minimal setting changes. The rendering itself only took 10 or 15 minutes to finish because of the limited use of materials.
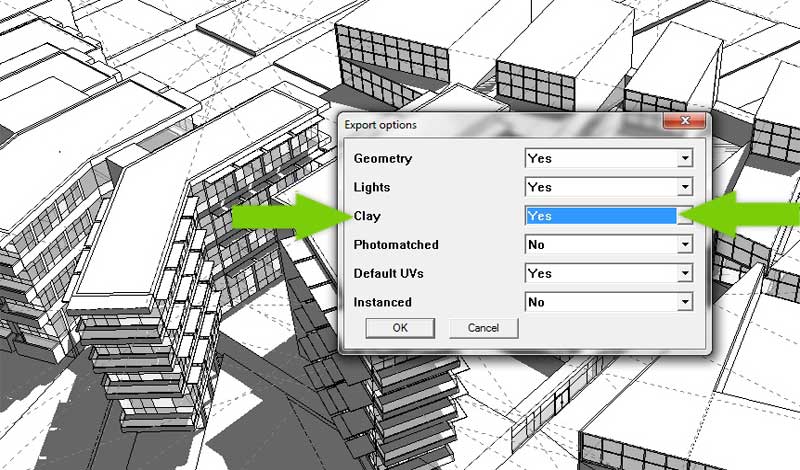
a. To begin, export the model from SketchUp using the Kerkythea plugin. Be sure that Shadows are on and that the view you want is set. In the export options, follow the settings below double checking that “Clay” is set to “Yes.”
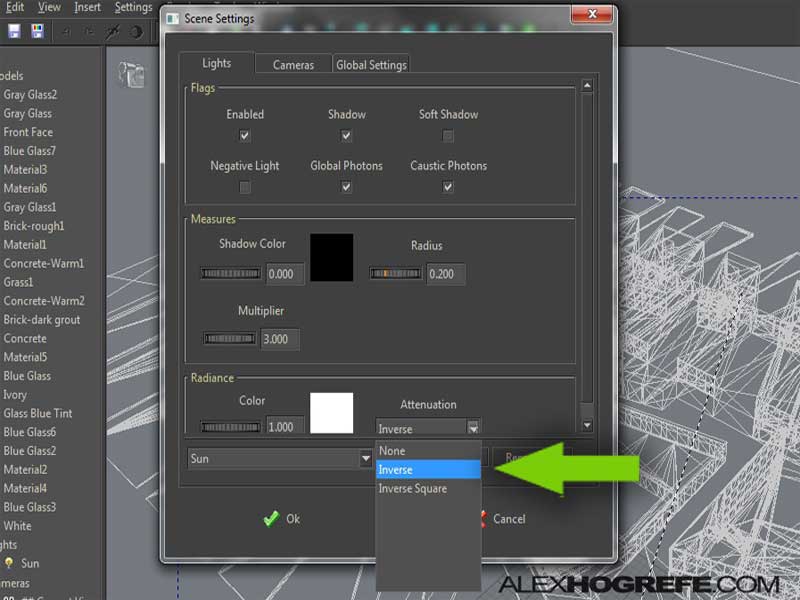
b. Open exported model in Kerkythea. At the top, select “Settings>Scene.” In the scene settings dialogue box, choose “Inverse” in the attenuation drop-down box. The setting will give you soft shadows similar to what you would get on a cloudy day.
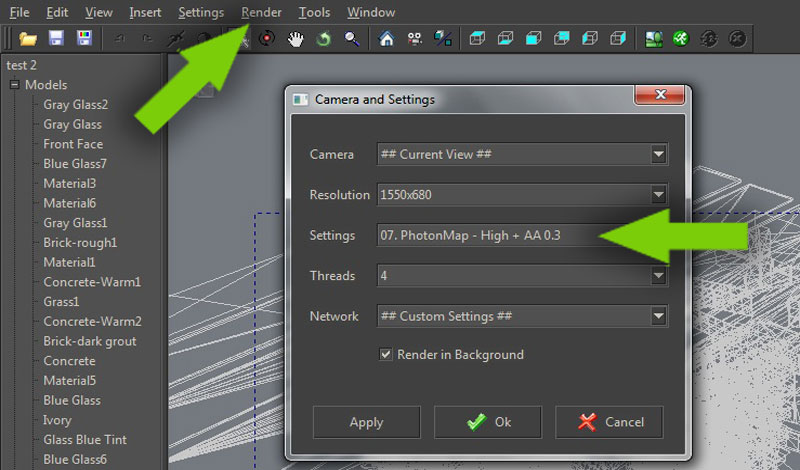
c. That’s the only setting that needs to be changed. Time to render. At the top, select “Render>Start.” In the dialogue box, Do Not change the resolution. However, do change the “Settings” to “07 PhotonMap – High+AA03.”
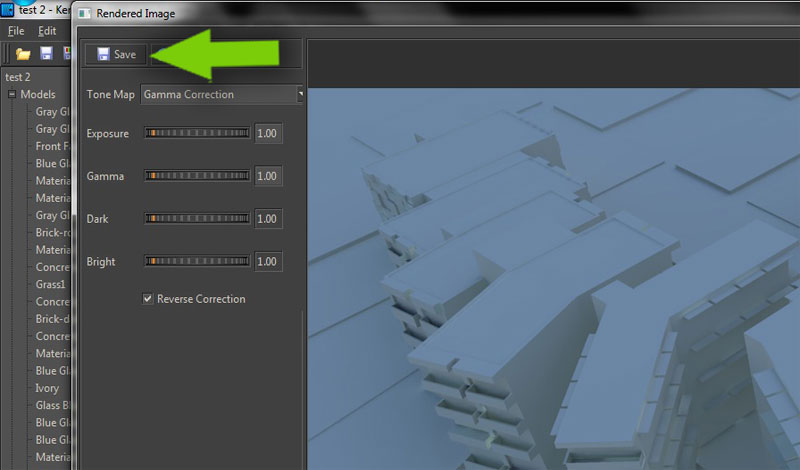
d. Let the rendering cook for a few minutes. To preview and save the final rendering, choose “Window” at the top and check “Rendered Image.” With the preview box open, select the “Save” button to save the image to your hard drive.
4. Photoshop Work
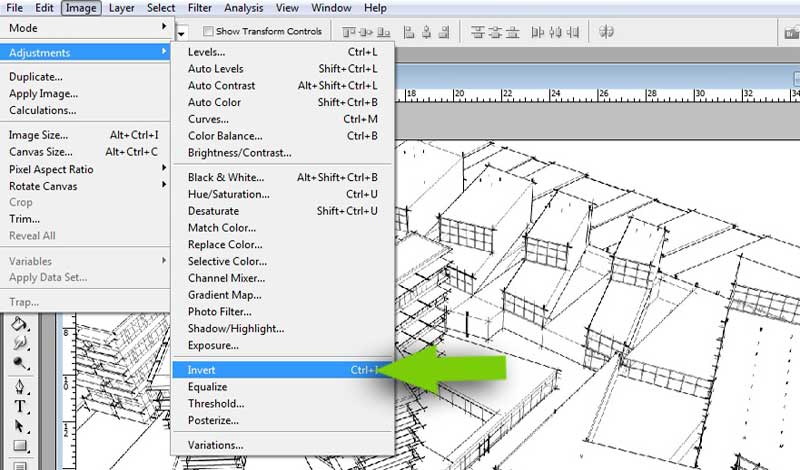
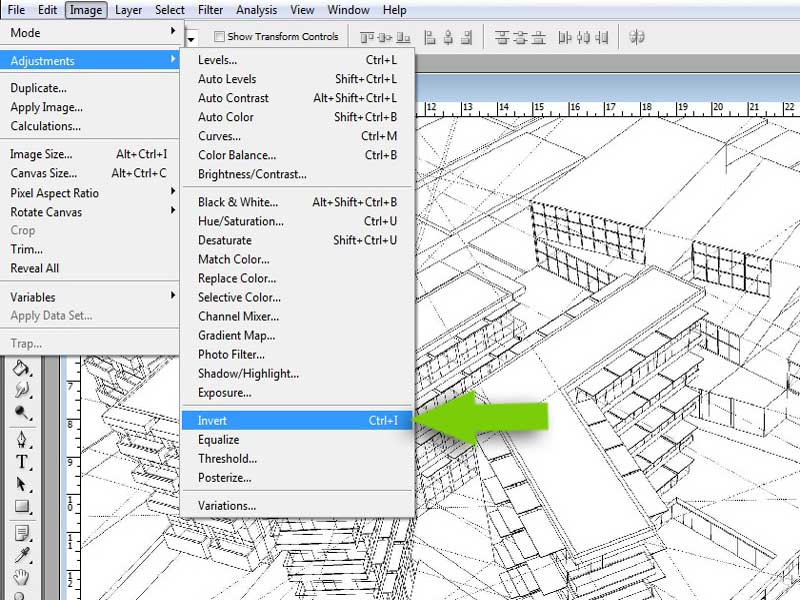
a. With the 3 images complete, it’s time to combine them in Photoshop. Begin by opening the first image (SketchUp export with extended lines) in Photoshop. Choose “Image> Adjustments>Invert.”
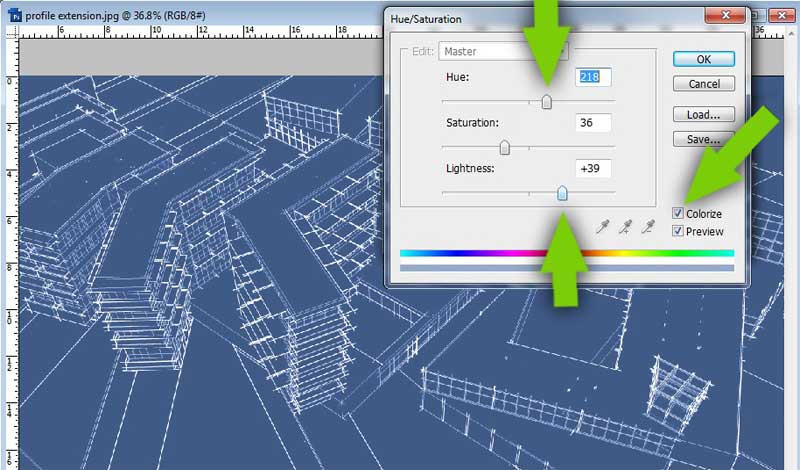
b. Next, open the Hue/Saturation dialogue box by going to “Image>Adjustments>Hue/Saturation.” In the dialogue box, first check “Colorize.” Move the “Lightness” slider to the right to lighten the black background to a grey color. Next, move the “Hue” slider until you end up with a nice blueprint color.
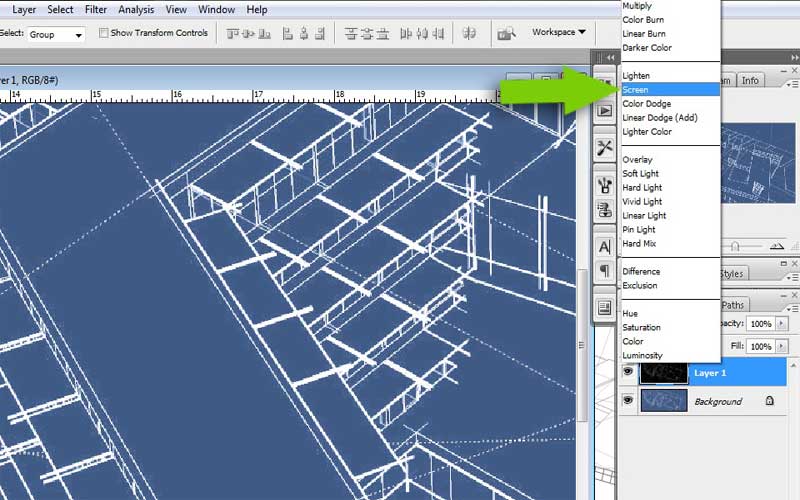
c. Place (or copy and paste the image on top, it will line up perfectly then) the other SketchUp exported image with the Guides and make sure its the top layer. Again, “Invert” the image so that the line work becomes white on a black background.
d. With the Guide layer still selected, set the Blending Mode (drop down box top left in the layers pallete) to “Screen.”
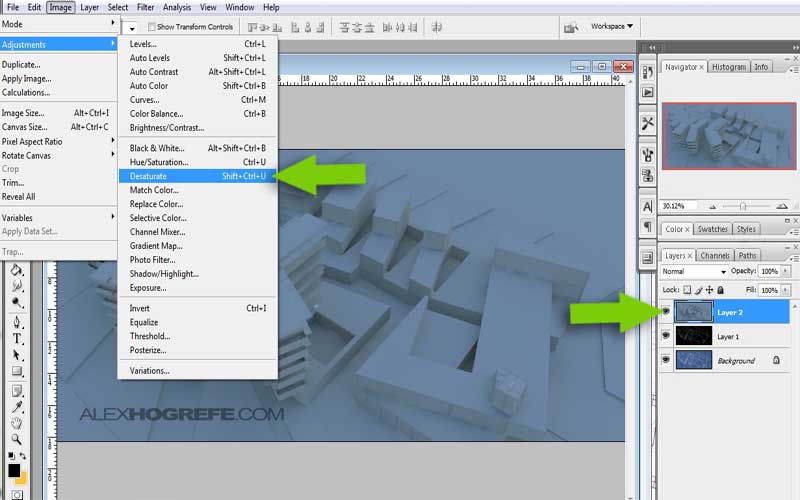
e. Open the Kerkythea rendering and drag it to the top layer (or copy and paste). Desaturate the image by choosing “Image> Adjustments> Desaturate.”
f. The image is a little flat. Adjusting the Levels will fix that. Adjusting the Contrast would also work, but I prefer Levels because of the added control. Choose “Image>Adjustments>Levels”.
Move the sliders until you end up with lighter and darker tones similar to the image below.
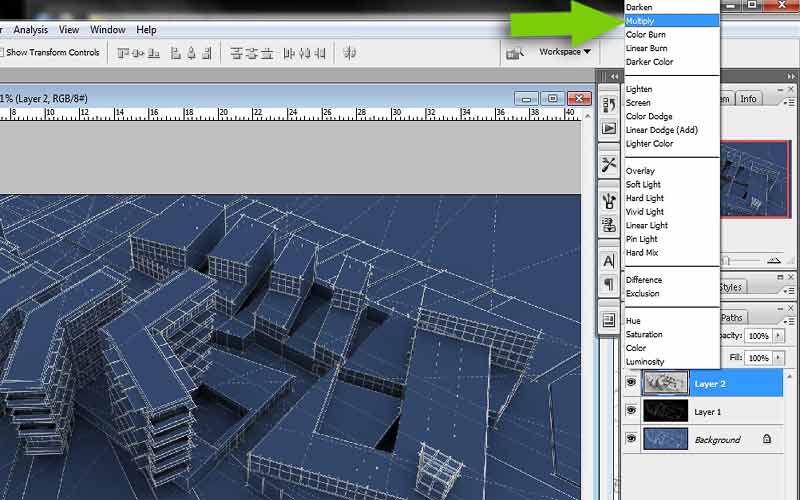
g. Making sure the Kerkythea rendering layer is on top, set the Layer Blending Mode to “Multiply”.
h. The illustration is almost finished. The last step is to add some texture to imitate the texture created from the blueprint chemical process. To do this, I just went online and found a “grunge” texture similar to the one below. Open the texture in Photoshop and move the layer to the top.
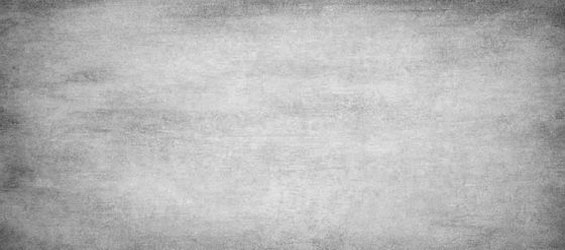
Grunge Texture
Finally, set the Layer Blending Mode of the grunge texture to “Overlay”.
That’s it. The first time I created this illustration, it took me about one and a half hours to make, including testing different settings and waiting for Kerkythea to render. Now that I have the workflow down, I’m guessing it would take about 30 minutes to create subsequent illustrations. The techniques are pretty basic, but it’s finding the right combination of layer blend modes and textures that give the final illustration a unique character.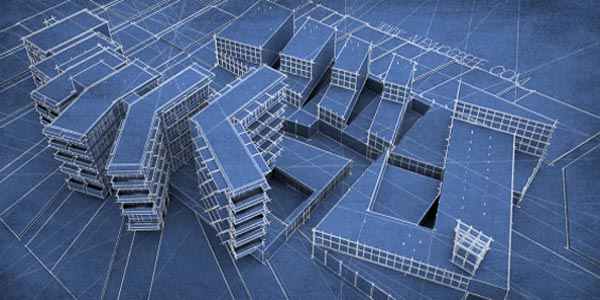
Final Image
Thanks for reading..
Alex Hogrefe



~ 0 comments: ~
Post a Comment