Showing posts with label Server. Show all posts

William R. Stanek, "Windows Server 2012 Pocket Consultant"

Tuesday, October 9, 2012 0 comments

Windows Server 2012 Pocket Consultant

Portable and precise, this pocket-sized guide delivers ready answers for the day-to-day administration of Windows Server 2012. Zero in on core operations and daily tasks using quick-reference tables, instructions, and lists. You'll get the focused information to solve problems and get the job done--whether at your desk or in the field.
Get fast facts on these essential topics:
Managing servers running Windows Server 2012
Creating user and group accounts
Monitoring services, processes, and events
Administering Active Directory
Managing files, folders, drives
Automating administrative tasks and policies
Administering data sharing, security, and auditing
Managing TCP/IP networking
Implementing data backup and recovery
Administering network printers and print services
XAMPP: Easily Install A Web Server In Your Windows

Wednesday, March 7, 2012 0 comments


Whether you’re someone running a corporate server, a hobbyist who wants to make a simple web presence, or a freelancer trying to make a website to market yourself, you shouldn’t overlook the advantages Apache Friends’ XAMPP package has to offer. This application has everything you need to get your site started without a messy installation process – PHP, Apache, MySQL, and FileZilla. It’s not just a bundled package. XAMPP offers you an installer much like the installer for any other normal Windows application all within the reach of a beginner.

Note: XAMPP is available for Linux and Mac as well. In this article, we will focus solely on the Windows version.

What Makes XAMPP So Special

Let’s say you’re installing Apache in Windows. You take the time to set everything up and you start running your website. The problem is that you can’t actually do anything lucrative on the site that doesn’t involve static pages unless you have an SQL server. You then install your favorite SQL server application and realize that you still haven’t installed PHP. The list goes on and on until you’re driven nuts by the complexity of an installation which may take hours.
Here’s where XAMPP comes in. Here you have an application that not only installs all these things you need to run the perfect website, but it also lets you install them as Windows services. Such services allow your computer to run Apache and everything else whenever your computer starts. The applications run silently in the background and don’t take up as many resources as they would if you execute them manually.

How to Install XAMPP

If you really want to give XAMPP a try, go to their download page here and scroll down to the latest version of XAMPP. Click the “Installer” link and download the app, then continue as follows:
1: Browse to the folder to which you downloaded the application and open it up.
xampp-installer
2: Select a language in the installer window and click “OK.” You might get a notice yapping about UAC in Windows if you use Vista or Windows 7. Just click “OK” and ignore it. I’ll talk about UAC in the next section.
3: Click “Next” to continue the installation after it shows you the welcome message nobody reads.
4: Specify a destination folder for the application. Your best bet is to leave it in the default location (“C:\xampp”), since this will make access much easier for you. Click “Next” once you’ve finished this.
5: You’re now seeing a window like this:
xampp-service
Here’s where you can install any of the component applications as services. I highly recommend at least installing MySQL and Apache as a service. Click “Install” once you’re finished. The rest of the process is pretty much self explanatory. Once you install the application, browse to the folder where it installed and check the “htdocs” folder. You can place files in that folder so they show up on your site.

Disabling UAC

If you want to run XAMPP properly, you have to disable User Account Control in your computer. This feature of Windows attempted to enhance the security of your computer by making you approve the actions of programs that you run. Although it sounded like a cute idea, it was proven to be ineffective. If you run a Windows version earlier than Vista, you don’t need to do this:
1: Press “Start + R” on your computer. Your “Start” key is next to either “Alt” key on the keyboard.
xampp-run
2: Type “msconfig” and press “Enter”.
3: Navigate to the “Tools” tab, select “Change UAC Settings” and click “Launch” below the list of tools.
xampp-msconfig
4: Move the slider in the settings window to “Never notify” and click “OK.” You have now disabled UAC.
xampp-uac
Once you’re finished with this, you can expect XAMPP to run smoothly and your web server’s ready for action!

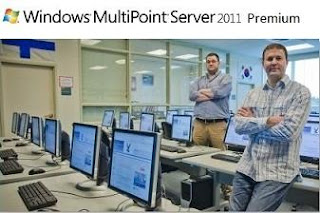
Windows Multipoint Server 2011 Premium x

Thursday, August 4, 2011 0 comments

Windows Multipoint Server 2011 is the second version of Windows product that is designed for educational institutions that allow multiple users to simultaneously share a single computer. Users have their own independent experience and familiar Windows computing, uses its own monitor, keyboard and mouse are connected directly to the host computer. 

Windows Multipoint Server 2011 allows more use to access a technology with lower costs. Designed for non-technical users, the simple things that used to manage. Unlike other similar solutions on the MARKET, Windows Server 2011 Windows MultiPoint is based on the latest technology and thus can run Windows applications. Support can be obtained through Microsoft or an authorized partner, and schools have access to full capability, the latest update, and the belief that they get the experience they expect.

Support Network connected clients.
Now RDP-compatible Network clients, including legacy PCs, conventional thin clients, LapTops, and netBooks can be repurposed into MultiPoint stations, and connect to the MultiPoint Server over your Network. Thin clients with support for RemoteFX technologies enjoy the richest remote multimedia experience.
Manage multiple MultiPoint Servers from a single location.
Great for labs and libraries where there are a large number of stations needing multiple MultiPoint Server host computers, MultiPoint Server can now discover and manage these multiple computers from a single MultiPoint Manager User Interface.
Provide even more access to students by turning one monitor into two separate stations.
With larger monitors, simply connect two keyboards and mice and have two students working on one monitor independently or collaboratively.

Integrate Windows MultiPoint Server with your existing Active Directory infrastructure through Domain Join.
By joining your Windows MultiPoint Server to your Active Directory Domain, you can leverage your existing user names, passwords and groups on your MultiPoint Server as well as apply Active Directory enabled features such as group policy and roaming profiles to your Windows MultiPoint Server.

Support for Virtual Machines.
Windows MultiPoint Server supports running with a Virtual Machine, which enables the benefits of Server consolidation, increased mobility, and easier backup.
Password Link
oke

credits :freesoft88

GuaBlog!

OhBelog!

Qoute from A's desk

Who walks the path of heaven will rule over everything... Bring the Peace, Keep the Peace, Walk in Peace then Rest in Peace...

Total Tayangan Laman

Followers

About Me

Recent Posts


ShoutMix chat widget

Link

Blogger Widgets
Related Posts Plugin for WordPress, Blogger...

Please help pay cup of coffee for us~

abrapism almawalker. Theme images by sndr. Powered by Blogger.

Popular Posts